Here is the grasshopper file.


A series of conical forms are used to control the radii of the wood strips. The more extreme the cone, the more open the gap in the strips.
A simple Catia diagram demonstrates the relationship between the cones and the strips. The parametric model allows for quick feedback between the manipulation of cone and the redulting affect of the strips and gaps.
Here is a link to a video of the Catia file.

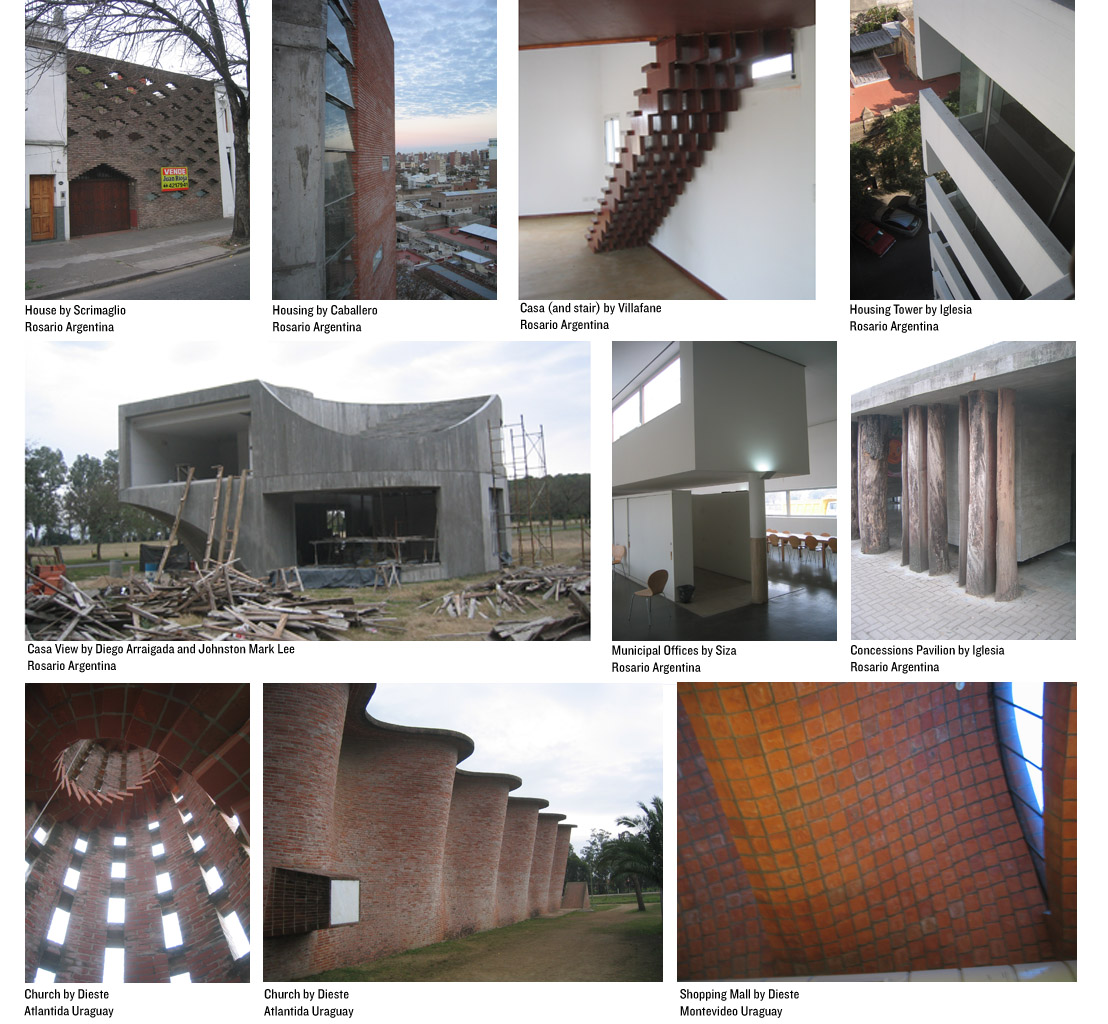
We saw some amazing projects. The architects were all very open and interested in talking about similarities and differences between architecture and practice. The most striking difference is the role of labor. In Argentina the labor is less expensive but the materials are more expensive in comparison to the US. As a result, the use of brick and concrete (cheap materials) is more widespread and of much higher quality. The craft and time taken to build with masonry or fabricate on-site formwork is not a fearful proposition as it is in the US.

Waiting for our table. With Gerardo, Marcelo, Luis, Juan, Craig, and Jen.

And the steak... We ate some very good Argentinian beef while drinking very good wine from Mendoza.
The goal for this project was to have the first few points lay flat before changing elevation. The thought was this would give it a stable base.
Projecting the shape flat then allows for the creation of the "V" column at the termination of the spiral. A split, subset, and interval are used to create spokes between different parts of the spiral.

Here is a link to the grasshopper file.

This tutorial takes the model from the previous tutorial and creates a simple exterior rendering. A sky and people are added with a couple of simple tricks in photoshop.
Here is a link to the 25 minute video tutorial.
While it is very easy to make a spiral with an equation, I took the approach to make a series of points that build (and translate) from the previous point. Once a series of 10 points have been created, an interpolate curve connects them and then these curves make surfaces. Dividing the curves a series of pipes connect points to form an in between structure.
As more rotation occurs between points, the curve must interpolate, creating oblong cuves.
While the file is not as elegant as I would like, the file includes shift and interval as a way to connect the various divide points. If anyone has a better idea how to repeat the multiple actions of the spiral, I would be open to hearing about it. As far as I know there is no loop function which would do the trick.
Download the grasshopper file here .
Here is a link to the 40 minute video.
Two splines are used to control a series of surfaces and the toolpaths used to mill the surface.
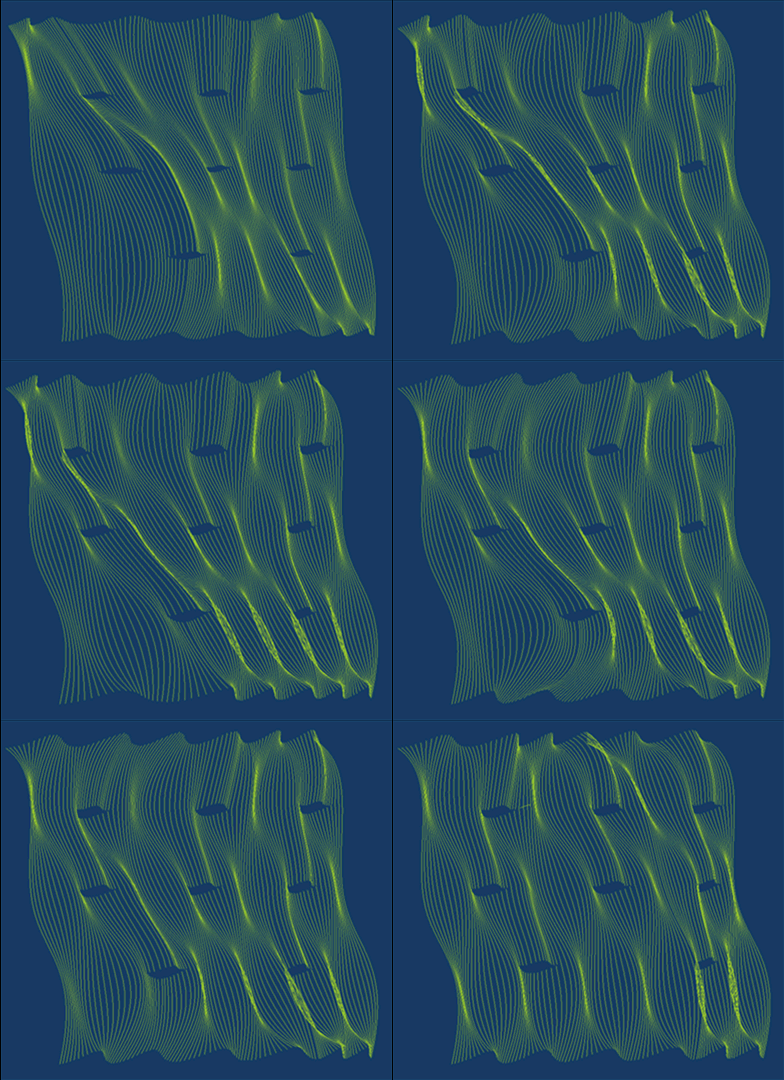
Here are the lines overlaid on the surfaces. At various points the surface splits to allow a small aperature to move from behind. The various iterations of the line drawings are made through the movement of the two splines. Digital Project was used to define the relationships and only after everything was worked out, the splines were modified to approximate the final proportions of the splines and aperatures.
The two renderings show the light from behind as trapped between the two surfaces. The final piece will be milled from plywood.
This series of models is more of a proof of concept for the aperatures. A new model will be developed using the splines, but using a different method to create a model with thickness. The current iteration is only one surface.

Here is a link to the 45 minute tutorial video.
Here is a link to the tutorial video.
Here is a link to the tutorial.

Then as the individual cell is made larger or smaller than the average size, it is made deep/shallow or thick/think. This variation is visible in the iterations below. This level of analysis adds a level of removal from the designer. One cannot be sure where the depth will shift.
Variations are rendered to give some sense of the range of variation possible. I will be gearing up for class in the fall and will post tutorials on document templates and rule firing, check back.Making a few tweeks with the sliders and then baking each, the variations from a screen shot below. Unfortunately I could not find a way to trim in grasshopper so this task is completed once the geometry is baked.